Using Pinterest for your blog can get you so many page views and so much traffic! Some blogs get well over 50% of their traffic from Pinterest alone meaning tens of thousands of views! However, it’s also very underused by a lot of bloggers!
There’s no doubt about it, food and lifestyle bloggers get the most traction from Pinterest but it can be good for travel bloggers and bloggers in other niches too!
Some pins and some blog titles will do better than others, but two things are certain:
1 – You have to put the time and effort into Pinterest to get these views, they don’t just happen, it does take work!
2 – When you put the work in and pins that are doing well, you’ll know about it!
Up until a few years ago, I had NO IDEA how to use Pinterest, but as I started to learn how to use it and learn how to pin using Facebook threads and Tailwind, I saw my views very clearly increasing from 0 into the thousands which definitely helped my monthly page views increase, which in turn helped me make more money through my blog from Ad’s & Affiliates.
This is a beginners guide to how to use Pinterest for blogs. Starting from scratch on how to use SEO and Keywords on Pinterest, how to create Pinterest boards, how to create Pinterest pins, how to use Facebook Pinterest, Tailwind and how to Manually Pin. Plus, which ones are best to do in 2020!
If that’s what you’re looking for, let’s get into it!
Tip: Don’t try to do this all in one day, it’s something you need to do in steps, so bookmark this post on using Pinterest for blogging and keep coming back to it when you reach the next step!
How to Use Pinterest For Your Blog
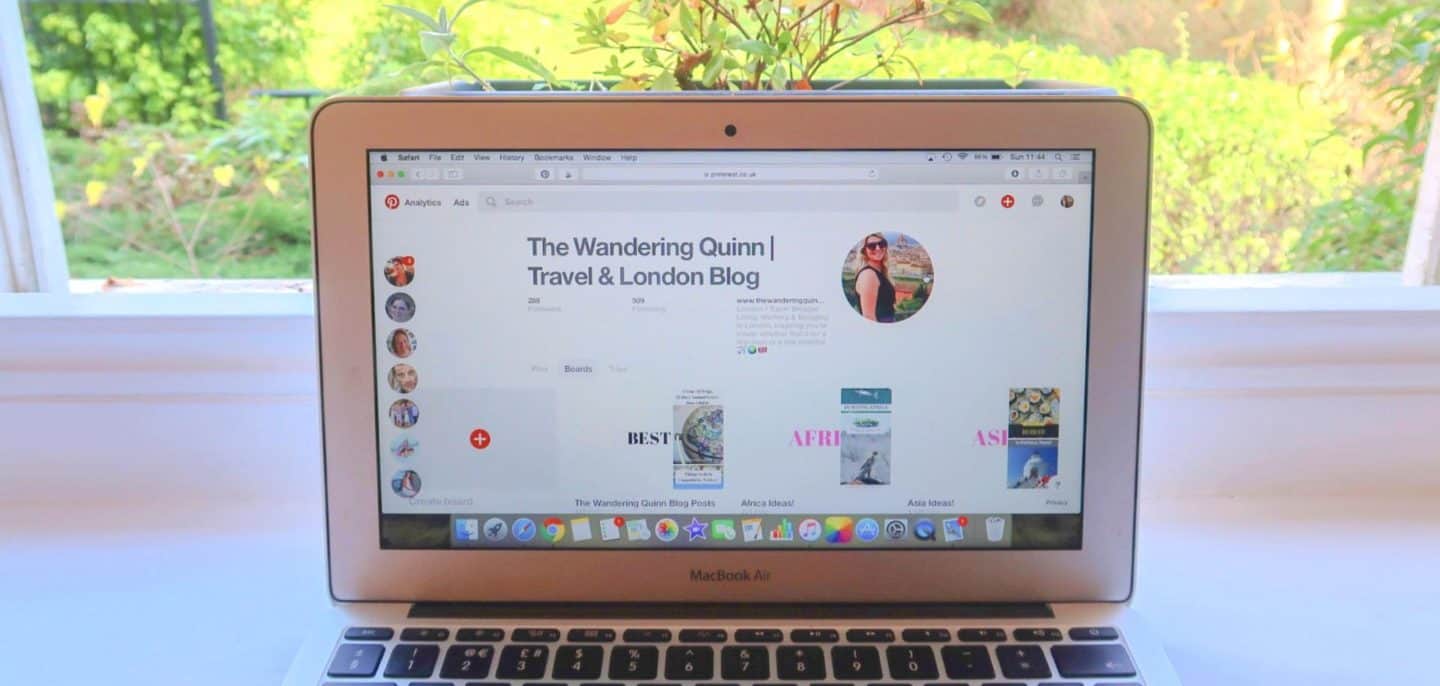
Tips on how to use Pinterest as a Blogger:
Pinterest is not a social media platform, it is a search engine.
Due to the above, it does not matter how many followers you have. Do not spend time gaining followers. They don’t have an effect on how well you do on Pinterest.
To really succeed with driving traffic from your Pinterest account to your blog, you need an understanding of SEO and Keywords.
Because Pinterest is a search engine, treat it like a ‘business’ platform, rather than a way to connect with other bloggers.
Pinterest is a 2-way thing, you share your pins to gain traffic but for your pins to be shared, you need to share other people’s pins too.
Pinterest needs time to grow, your pins need time to be found. Pinterest is not a quick fix in terms of increasing page views.
Implement my steps below and keep doing them every day / every few days. Checking your stats but don’t put any pressure on yourself for at least 3 MONTHS because it’s likely you won’t see much of a growth until then!
If you don’t have time to pin and schedule pins there are lots of people out there who will do it for you. Hiring a Pinterest VA is a very popular thing to do if you’re willing to invest and help grow your traffic. Don’t think that all bloggers do this by themselves! If you want to hire a Pinterest VA you can look on platforms like Upwork.
- In this post I have covered:
- 1 – Creating an Account
- 2 – Creating Relevant Boards
- 3 – Create Pins & How to Create Pins
- 4 – Uploading Pins & Pinterest SEO
- 5 – How to Sharing Pins including Group Boards, Facebook Threads and Tailwind
- 6 – How to Carry on & Make this a Routine
1 – Create a Pinterest Account and Ensure it is on a Business Profile.
Create a new Pinterest account and create it as a business account. If you already have a Pinterest profile that you use for your own personal pinning of things that are not related to your blog, create a new account!
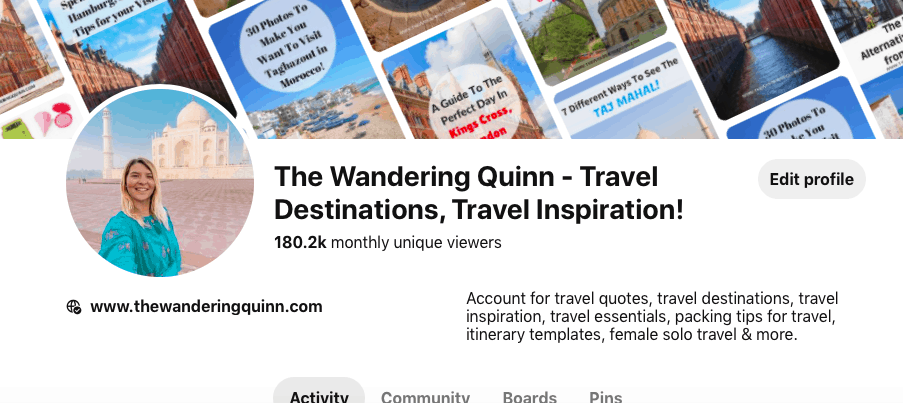
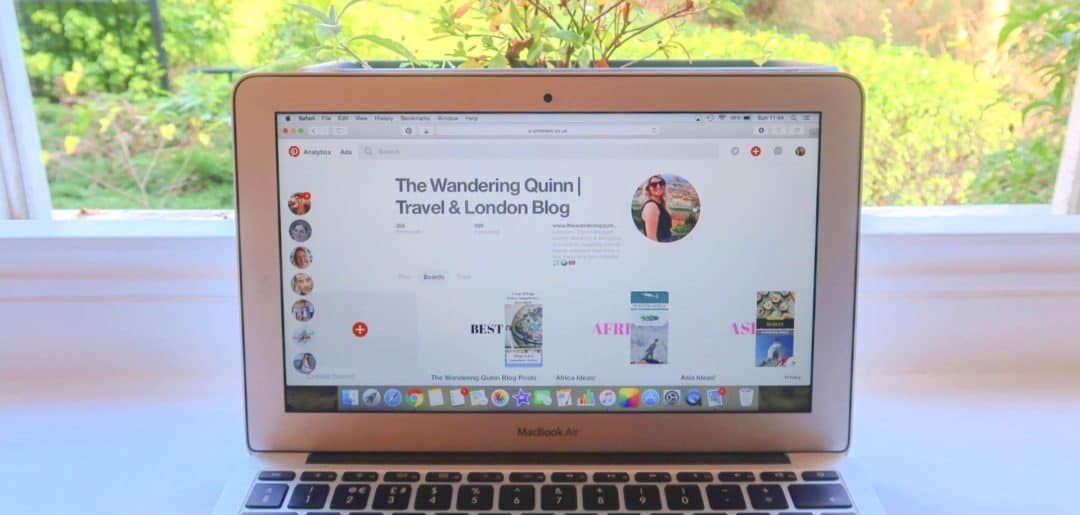
Your Pinterest account needs to be the same name as your blog. Create a bio that describes your blog and what you’ll be pinning. Don’t use this as a ‘personal’ bio like on Instagram. Fill it with Keywords like you can see I have done below.
I learnt from watching my friends youtube video (watch it here) that Keywords in your profile name and bio are so important because Pinterest can then show you account to the right people when they are searching!
2 – Create a Set of Boards to Match your Blog Style.
If you are a travel blogger like myself you’ll want to set up a selection of boards that are travel related. I use Continents but others create one for each Country.
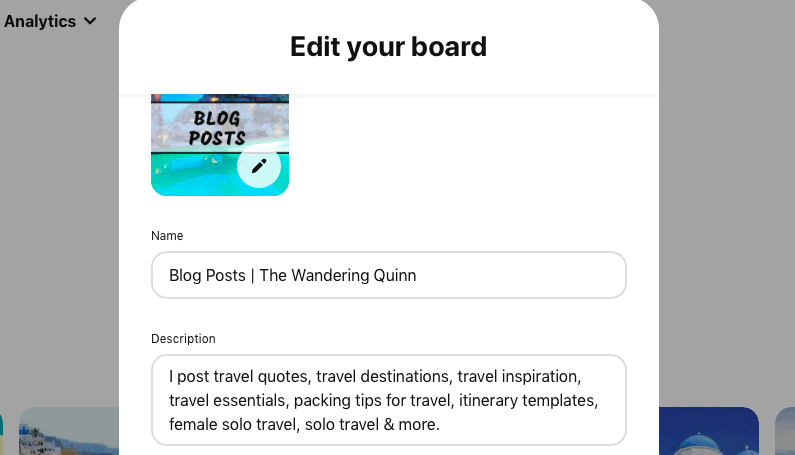
As you make these boards make sure you add keywords into the board descriptions as you can see I have below.
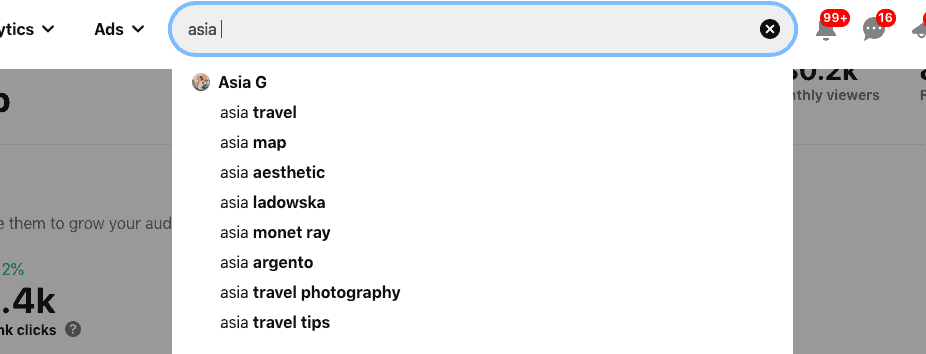
If you’re not sure on how to find the right keywords use the Pinterest search tool to see what people search for.
For example, if I type in ‘Asia’ for ideas for my Asia Travels Board, I can see people are searching for ‘Asia Travel’ ‘Asia Travel Photography’ ‘Asia Travel Tips’ which are all pins that I pin so I will add these keywords into the board description!
One board you definitely want to create is one for all of your blog posts. Think of it as a file of your work. ‘Best of (The Wandering Quinn)’ or ‘(The Wandering Quinn) Blog Posts’, works well.
Tip: Don’t spend too much time on this, create a few boards that you can think of to start with. As you start pinning you’ll realise what other boards are needed.
For example, I didn’t have a ‘Gifts’ one but as Christmas approached I quickly created a ‘Gifts Ideas’ board for all of the travel gift guides that were being shared!
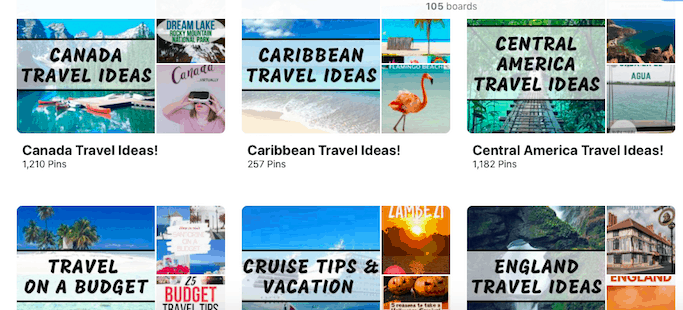
This is a snapshot of what some of my boards look like:
I have created board covers with the name of the board on which is why it looks the way it does, you can create these now or later in the stages of you using Pinterest.
3 – Create Pinterest Pins for your Blog Posts Using Canva.
Before you start ‘pinning’ you need to create pinnable images to pin!
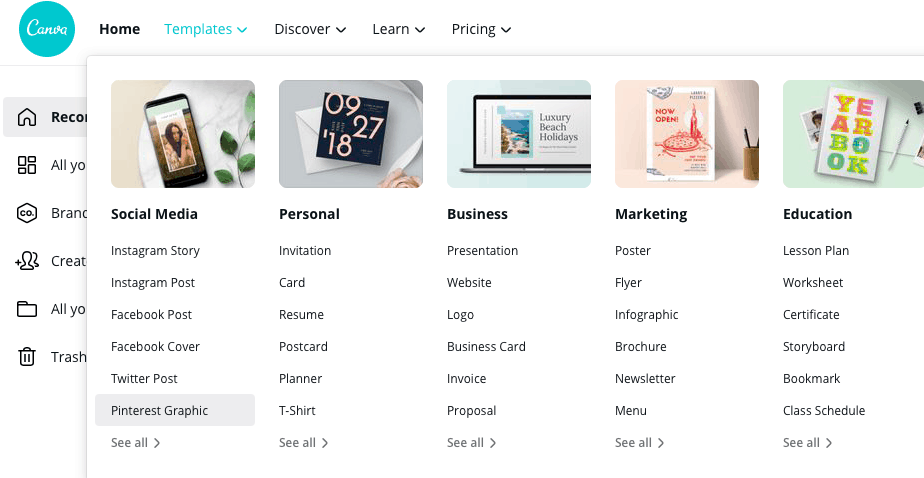
Most bloggers tend to use Canva because it is really easy to use, plus it’s free for basic designs, I don’t pay for any designs. There is even a Pinterest Graphic you can edit and this size works best on Pinterest so use this.
Create at least 2-4 pins per blog post as you want to share your blog post more than once on Pinterest.
Look on Pinterest first for inspiration of what to make your pins look like, think about which ones attract your attention most and be inspired by these.
If you are an established blogger with a lot of blog posts already, I suggest creating 2-4 pins for your top 10 viewed blog posts and for your 10 most recently published posts, or something along those lines. This will give you a good amount of pins to share for the first few weeks for blog posts that you know are already in demand.
Tip: If you don’t have many vertical photos that you have taken yourself, don’t be afraid to use stock photos. I prefer using my photos as it feels more personal but as said, Pinterest is Business so if a stock photo looks better, use it. I use Pixabay & Pexels mostly, they provide free images and there’s no need to credit them. There are lots more available sites too.
4 – Upload a few Pins onto your ‘Best of’ Pinterest Board & Implement SEO!
Now you need to get your pins onto your Pinterest account to grow your Pinterest as a blogger.
Don’t upload all of the pins you have created in the step above onto your profile because to get the most out of Pinterest you need to upload them slowly and regularly (more info on that in point 5).
For now, upload 5-10 pins onto your ‘Best of’ board.
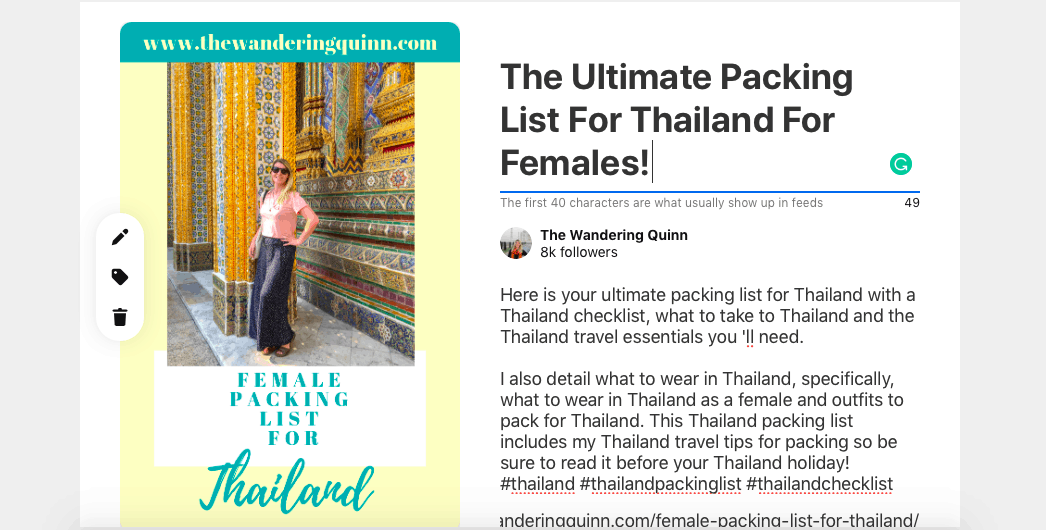
Simply click ‘Create’, ‘Create Pin or Product Pin’ Upload your Image, Add the Title, Add the Description, Add the URL, Save it to your ‘Best Of’ board and click ‘Publish’.
It is really important here that you think about SEO & Keywords! Yes, Pinterest is all about SEO too!
Add the keywords of your blog post into the Title and Description because remember, Pinterest is a search engine just like google! Use all the characters and add some hashtags at the end of your description too!
Also, with your title, from experience I have found that people on Pinterest tend to click on titles like ’10 Things You Cannot Miss in London!’ more than ’10 Things To Do in London!’, so think about that because your Pinterest title doesn’t have to be exactly the same as your actual blog title.
5 – Start Sharing Pinterest Pins and Repining Others Pins.
*2020 Update*
As of late 2019 and 2020, the Pinterest experts say that the success to Pinterest is to pin about 10-15 of your own pins a day and about 3-5 pins from other accounts.
Another 2020 update is that Pinterest likes FRESH PINS, it doesn’t like you to keep pinning old pins or designs that you have already pinned, which means you’ll need to be on Canva creating pins a lot more!
This means that some of the ways people pin have changed to what the advice was back in 2017, 2018 and even 2019.
Here are 4 ways you can share your pin’s and re-pin other people’s pins:
5.1 – Use Group Pinterest Boards
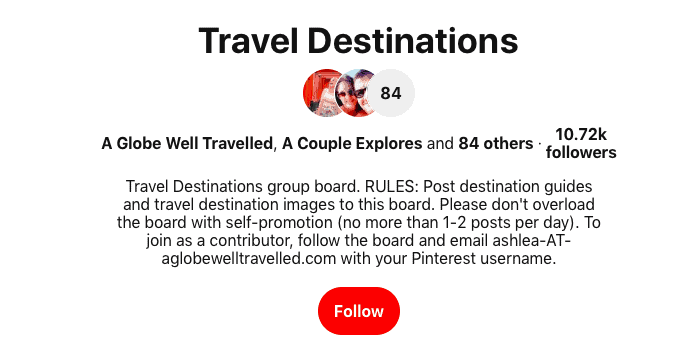
Group Boards on Pinterest have always been very popular and they still are. In order to do this you need to join some group boards, I would suggest finding these by looking on Pinterest users profiles that are in the same niche as you. A Group board is identifiable by the circle of accounts that shows on the board (see image below).
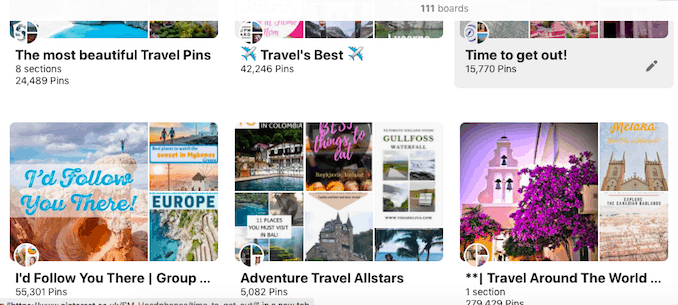
Usually, you need to request to join group boards. To do this, click on the group board and you’ll see something like the image below which details the rules of the board, how to join (usually by emailing the admin) and a button to ‘follow’ the board.
Posting in group boards are a good way to post your new fresh pins every day as per the new 2020 suggestions, and find a few pins from other bloggers to pin too because like I said, it’s suggested to post mostly your own pins and only a few from other bloggers!
5.2 – Use Facebook Pinterest Pages & Threads
You may have heard about Pinterest Facebook groups. These groups have daily and weekly Pinterest ‘threads’.
This means that you post one of your pins in each thread, everyone in that thread has to repin your pin, and you have to repin everyone’s pin too.
Sometimes the threads are quite small with 30-50 pins, sometimes they can be quite big and up to 200 pins.
Facebook threads were suggested for a long time and many people still use them in 2020, but by using them and using them every day it means that you are pinning a lot of pins from other people, so keep this in mind.
In order to find Facebook Pinterest Pages, you will need to join the pages. You can use the search tool on Facebook to search pages under your niche and something like the below will appear:
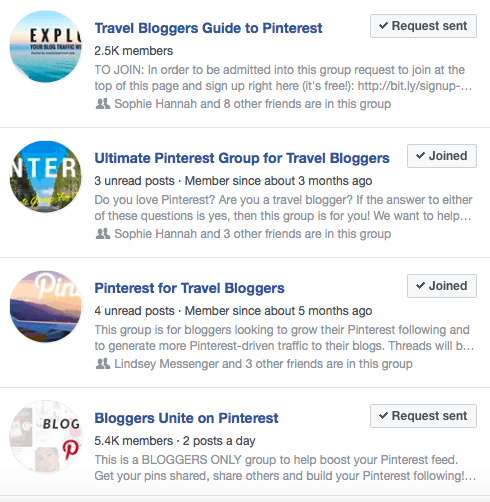
When joining the Best Facebook Groups for Pinterest keep 4 things in mind:
1- Make sure you join a page that is relevant to your blog, e.g if you blog about beauty or mainly lifestyle, don’t join a travel related page.
2- Read the description, not all Pinterest for Bloggers Facebook pages will be to share pins. Some will be for information and learning purposes, which are fine to join but don’t spend days waiting to be approved only to realise you applied for a board that wasn’t what you thought it was for!
3- Read the rules! These rules will include the fact that if you share a pin you HAVE to re-pin everyone else’s along with how long you have to pin them after you have pinned yours. Plus, certain boards have restrictions on which blog posts you can share. E.G most travel-related pages don’t let you share ‘blogging tips’ pins!
4- It can take a few days to get approved to a Facebook page so don’t wait for the day you want to start using them to apply as you won’t be able to use them until you get approved.
Tip: If you are a travel blogger, ‘Mappin Monday’ is a great one to join! So is ‘Ultimate Pinterest Group for Travel Bloggers’ as seen above.
How To Use Facebook Pinterest Threads
Let’s use ‘Ultimate Pinterest Group for Travel Bloggers’ as an example of how to use these Facebook Pages!
Each day one of the admins will post advising that todays thread is now live. Each daily thread on this particular group is live for 24 hours.
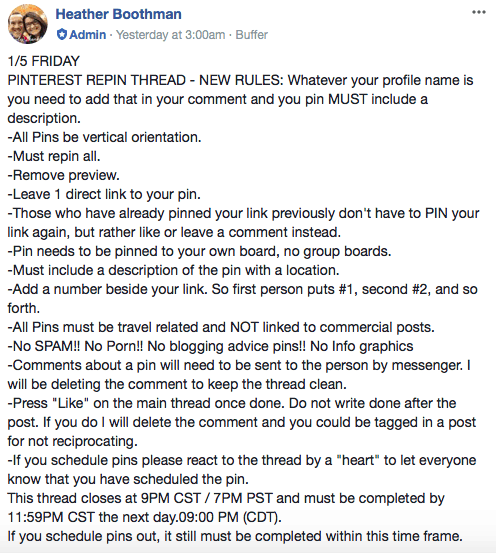
Copy the Pinterest URL for the pin of yours you want to share from your ‘Best Of’ board.
Scroll down the thread on Facebook, see what the last number was, # the next number, your blog name and your pin URL. Wait a few seconds as initially the preview will appear which as per the rules, you need to remove. Click remove preview and you’re done.


Once you have pinned yours, its time to pin everyone else’s. Go to #1, click on their URL and save it into your most relevant board (do not pin these into group boards, only your own boards!), like their comment and carry on doing that until you get as far as you can!
Due to the boards being live for 24 hours there will be people who post after you so ensure you go back the next day or later on and keep pinning until the thread is closed! Once a thread is closed you want to be able to look back and see a like against every single comment so you know you have pinned every one.

Tip: The process I use is loading about 10 or so tabs from the comments in one go and as I load a new tab I ‘like’ the comment, this way I know where I have got to in the comments. Then I go through every tab to save it. I close all the tabs and start again! This is the most time-efficient way to pin Pinterest Facebook threads I find.

5.3 – Use Tailwind to Schedule Pins.
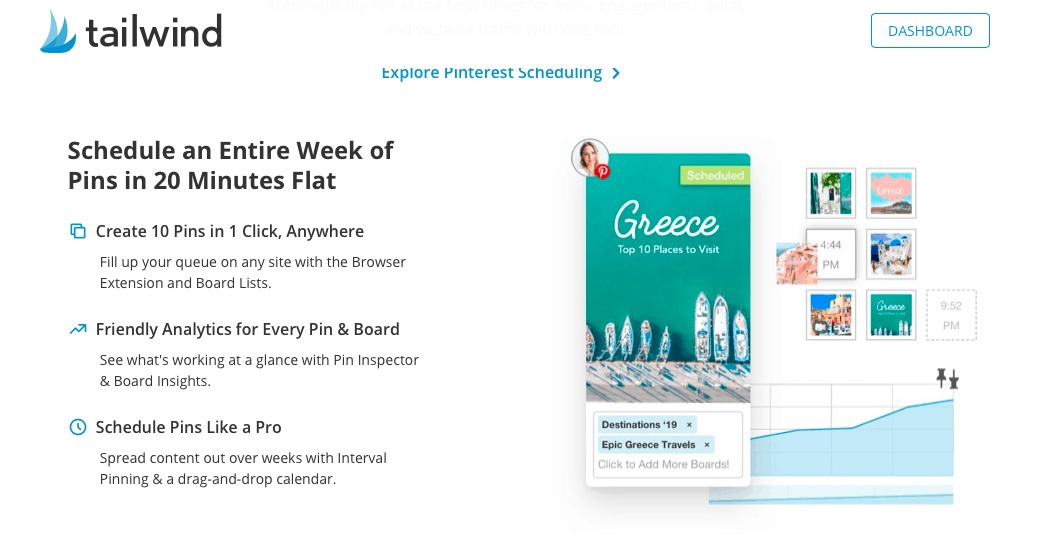
Tailwind has been a popular scheduling tool for Pinterest and bloggers for many years. It lets you bulk load pins which will schedule on the days and times you set. It means with some work, you can schedule your pins, and other peoples pins for the next few weeks, even months and during that time you don’t need to do anything as you did all the work when scheduling.
Tailwind Tribes are also popular, this is a way to get other people to pin your pins and in turn, you pin their pins. A bit like group boards on Pinterest directly.
It’s worth noting that as of 2020 I have seen many bloggers say that they have cancelled their Tailwind subscription and stopped using it. This is because Pinterest wants FRESH PINS and I believe that scheduled pins are not considered ‘fresh’.
If you want to give Tailwind a go though, you should! Tailwind is free for your first 100 scheduled pins, so its worth signing up and testing it out. After that, it will cost you a minimum of $9.99 a month for unlimited scheduled pins and you can cancel at any time which is handy.
5.4 – Manually Pin Directly on Pinterest
This is what I see most bloggers talking about these days, especially in 2020.
It fits in with Pinterest wanting FRESH Pins and it also helps you pin mainly your own pins and only a few pins from other people.
This will mean spending time on Pinterest pinning every day but it seems that it’s worth it.
However, as of 2020 (I believe) Pinterest now has it’s own scheduling tool which you can use so that you don’t have to be on Pinterest posting pins every day!

Plus, if you batch create new Pinterest pins every few weeks, you save all of the post Titles, Descriptions and URLs that you want to post in a document, it won’t take you long to upload 10 pins, copy and paste in the details, publish them and pin a few pins from other peoples accounts.
And that leads me onto..
6 – How to Carry this on & Add it to Your Routine!
This may seem like a lot of work but once you get into a rhythm it becomes a lot easier.
Whether that’s pinning through Facebook threads that you quickly become really fast at doing, or manually uploading pins most days of the week because it becomes a habit.
A lot of bloggers I know use a spreadsheet which details what they’ve pinned and what they need to pin.
I also suggest trying a few of these options and seeing what works best. You won’t know for a few months but if you keep track of it you should be able to see what’s working and what isn’t.
Remember to keep up to date with the new Pinterest guidelines. Facebook groups for Pinterest users are a great way to stay up to date with ‘what Pinterest likes’ and to ask other bloggers for help and advice!

For even more advice on how to use Pinterest for blogs, have a watch of my friend Janet’s YouTube videos on how to use Pinterest! View her Pinterest Playlist here!
I hope you have found this post useful! I would suggest doing this post STEP BY STEP, do not try to do it all in one day as it’s not going to happen.
Bookmark this blog post and do each section at a time, keep referring back and it will all come together!
Super helpful!
There is so much information out there about using Pinterest to grow traffic but this laid it all out in such a straight-forward way.
Going to start actioning all of the above now 🙂
Thanks! x
I’m so happy to hear this Emma! Thank you so much for letting me know!
Woo! Go for it! And if you have any questions, just ask! 🙂 x
This is an amazing post Ellie! I’ve been putting off using Pinterest for months as I’ve not had a clue how to use it, but after reading through your post I feel armed and ready to get on with it! Thanks so much for such a useful read! x 🙂
Yay, thats so good to hear Nicola! I really tried to break it down, so take it section by section. Once you’re set up though the only time it takes is making pins and re-pinning but you’ll soon start seeing the traffic on your site so it makes it worth it! If you have any questions, just let me know! 🙂
Great post! Just what I was looking for. I am just starting this whole Pinterest thing and perhaps it is a stupid question but with the re-pinning of others on Facebook Groups or Shared Boards – is it acceptable to repin everyone as requested but deleting some pins after a few weeks? otherwise, I assume my boards would become huge very quickly…and very hard to manage….
Glad you found this useful!
No I don’t believe that is ok, I guess that way to look at it is you wouldn’t like it if someone did that to you and it would stop you getting views from your pins which is the whole reason for doing it.
I don’t really manage my board they kind of just work themselves and the more pins you get the more they should appear at the top when someone searches for the topic.. a bit like Google’s first page! 🙂
Thank you so much for clarifying this point. Also another issue I am a bit confused -does it matter if I repin on my personal Pinterest account or on my Blog/business account? thanks so much 🙂
That’s ok. I don’t think it matters but i would set up a blog/business account if I was you as you can see stats and things that I don’t think you can see on a personal account. I don’t think you have to make a new account though, you might be able to switch an existing one 🙂
Thank you so much for straight forward workflow. I just started my blog and learning how to use pinterest to build traffic. There is a lot of info out there, and it’s overwhelming. This lays it out all clearly.
I just had a few quick questions. You mentioned creating multiple pinnable images for posts. Does this mean for example after I finish writing a post go to canva and create 2-3 images for that same post? Then do I schedule image 1 for week 1, image 2 for 2, image 3 for week 3? Do I pin them on the same boards? Thanks again!
Hello! Thank you for reading the post and commenting! I’m glad you’ve found it helpful!
It’s totally up to you but I go onto canva as soon as I’ve finishing writing my post and make 2-3 Pinterest images, and then I share one of them the day after the blog post has gone live in a Facebook group, usually mappin Monday and then I try to share the other image a few days later. I’m not sure what difference it does make I’ll be honest but I feel like it’s good that they’re both out there and circulating them. I save them both to my best of board on Pinterest and then use a Facebook page to get them pinned ? I hope that helps!
I’m (finally) getting around to starting to use my Pinterest for my blog – this post has been SO helpful! Fingers crossed I can get the hang of it quick! 🙂
I’m so pleased Maja!! Once you get it you just get it and it becomes habit and I’m sure you’ll get there soon! Any questions just let me know ?
this is so useful! thank you so much for this. sometimes i get overwhelmed when i see people get like thousands of followers after just a month of using pinterest. and for someone who isn’t doing blogging full time, that can also be discouraging. thanks so much for this!
You’re welcome. I’m glad you’ve found it helpful and useful 🙂
Attention all Pinterest users…here is a fantastic opportunity that I have just discovered. This company is willing to pay good money to people who know how to pin on Pinterest.
If you have a Pinterest account and know how you use it, then this could be your lucky day. Get the full story here:
https://socialsalerep.com?hyden8257
This was everything I needed I did not really understand how to use pinterest for my blog but now i do thank you so much appreciate the help 🙂
I’m happy to hear that! Thank you for letting me know and well done for giving it another go 🙂
Hi!
I’m just getting started and that was exactly the post I was looking for to launch my Pinterest account! I typed “step by step Pinterest blogger guide” on Google and I found your blog. I love when everything is guided and you just have to “check” each task!
To tell the truth I don’t have finish the first routine because I was wondering how to concretely start scheduling with only 7 different pins on my blog? I want to be able to pin each day but I don’t know if I have to pin several time the same pin?
Thanks in advance for your help!
Sincerely,
Mihoki
http://www.mihokishares.com
Hello! So glad you found this useful and that it came up on google that way for you, thanks for letting me know!
Definitely pin a different pin each day/time, never share the same pin on Facebook twice otherwise it’s likely most people would have pinned it already if you use the same thread as generally the same people participate. But you could load the same graphic onto Pinterest again to make it technically a different pin or create 2-3 designs for the same blog post and then that’s 2-3 different pins you can share which all link back to the same blog post. I hope that answers your question? 🙂
Hi! Thanks for your answer!
You’re welcome!
Yes, your answer helped me a lot, thank you ☺
I wish you an excellent continuation, your blog is awesome by the way!
Thank you! Good luck too!?
Thanks so much for this! That was exactly the post I was looking for. So many tips! And super useful! I am getting started at Pinterest now and follow your advice.
So good to hear, thanks for letting me know!
Good to hear! Thank you for letting me know!
I’ve never used Pinterest for my other blogs before, so totally clueless how. Thanks for the guide, Ellie! Helped a lot in setting things up. 🙂
You’re welcome!?
I wish I found your blog earlier! I’ve only just started travel blogging seriously and am feeling overwhelmed by what tools I need to ensure it’s a success, especially this Pinterest. Why does every travel blogger have this Pinterest thing!?! Do I need it!?! What it Pinterest!?! Your post was the first one I came across that explained it all perfectly in simple terms. I now have a Pinterest account ready to go. You are a superstar!! Thank you ever so much 🙂
Glad it helped you! I feel like you definitely don’t need to do Pinterest but it is good for page views for sure so if that’s what you want to increase then it’s good 🙂
Pinterest has seemed like such a difficult thing to crack till now, but this post was so helpful, thankyou!!
Alex ?
http://www.alexgettinglost.com
Oh that’s so good to hear Alex! I felt exactly the same but now it’s so easy, with the Facebook threads anyway, I’m still a bit stumped on tailwind tribes etc but hope you can get started now! 🙂
This is soo helpful. Been looking for a detailed guide like this one. Thanks!
Oh that’s so good to hear!! 🙂
Thank you for this, much needed! I now have a selection of pins to start pinning. 🙂 One thing though – when you say create 2-4 images per pin, do they need to be different? How would I add variation to them?
You’re very welcome! Yess I’ve recently been told to make as many pins for 1 blog post as possible. So now I’ve started to make 2 variations I like and then just edit them a few times with a slightly different title or photo on the pin or just different colours. I don’t think you need to make say 5 totally unique ones but 1 you like and edit that a few different ways. 🙂
New to blogging and I’ve been confused (and overwhelmed!) by Pinterest – this post was awesome and answered a big question for me – am I supposed to make more than one pin for each blog post? The answer YES has given me a solid direction for the weekend to-do list!!! 🙂 Thanks for the clear post and awesome advice!!
Yess is definitely the answer! And you’re welcome!?
Hi Ellie,
Thank you for this great starter guide!
I have just recently opened a Pinterest account, and am currently trying to work it all out. I wasn’t aware of Canva or Tailwind. I’ll have to look further into them and refer back to your article here for using them properly!
Matt
You’re welcome Matt. Definitely look into those too and they’ll really help you get started making pins and scheduling them for people to find 🙂
Hi Ellie,
Thank you for this beginners guide! It’s very helpful resource.
I have a Pinterest account that I stopped managing but you inspired me to use it again to grow my blog’s traffic. I’m using Canva to create my graphics for my other social media platforms. I’m gonna try Tailwind 🙂
I have a question though, what’s your favorite Pinterest tip that get you results so far.
Hope to hear more from you 🙂
Regards,
Valerie
Glad to hear you find it useful. My biggest tip is consistency of pinning and making multiple pins for the same post 🙂
Hi Ellie!
As someone who is new to blogging and just starting out, this was SO helpful. I’ve read so many blog posts on how to use Pinterest to grow traffic and I feel like most of them are full of a lot of useless information (or they immediately direct you to a class you need to purchase). Thank you for creating something truly useful that anyone can access.
-Aimee Long (long4adventure.com)
Ah you’re so welcome and thank you for the feedback! Really glad you found it helpful! Keep going and all the work pays off I promise! 🙂
Hi Ellie! This article was SO helpful and I can’t wait to read more of your articles you have posted on your site. I am working on creating a travel blog online now and researching ways to use Instagram and Pinterest to my full advantage. Thanks again!
Melissa
Yay! This is so good to hear! Thank you for letting me know!
Hi Quinn,
Are you still using Facebook groups for resharing or only tribes? Some people say that resharing a lot of pins through Facebook groups can be spammy as they are not quality shares. What do you think about it?
Thanks in advance for answering.
Diana